User manual
qualified.ink for Adobe Acrobat Reader DC and
Adobe Acrobat Standard/Pro
1. Initial configuration of qualified.ink and signing for the first-time
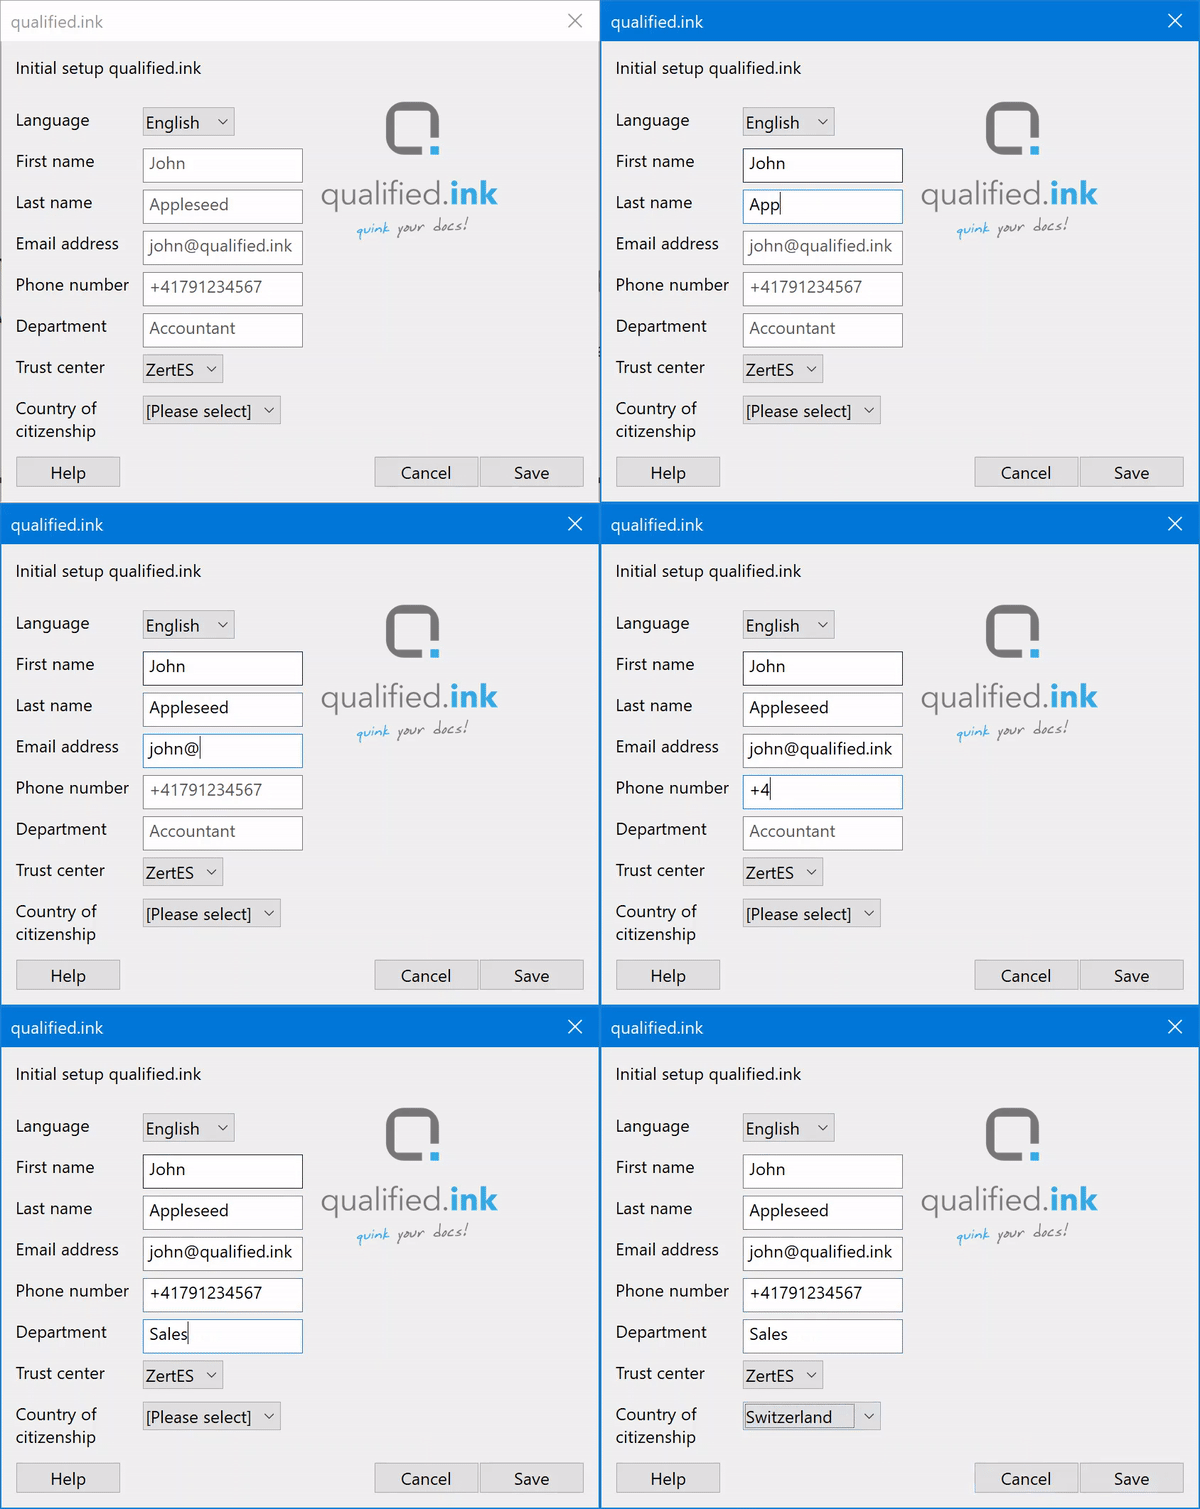
Prior to the first signature, the user has initially to provide the data to the qualified.ink tool. Click on the qualified.ink icon in the right toolbar. The qualified.ink bar on top of the document will open. Click on qualified.ink. The configuration screen will open.
Choose your language and fill out the fields of the registration screen with the same information during the registration process:
- last name,
- first name,
- email address,
- phone number (in the format +<country code><service provider><number>),
- optionally the department you’re working in,
- select the correct country of nationality (country of the issuer of your passport) and
- choose the legal signing territory (ZertEs or eIDAS).
Click on Save. If the data has been entered incorrectly, you will be prompted by a dialogue box.
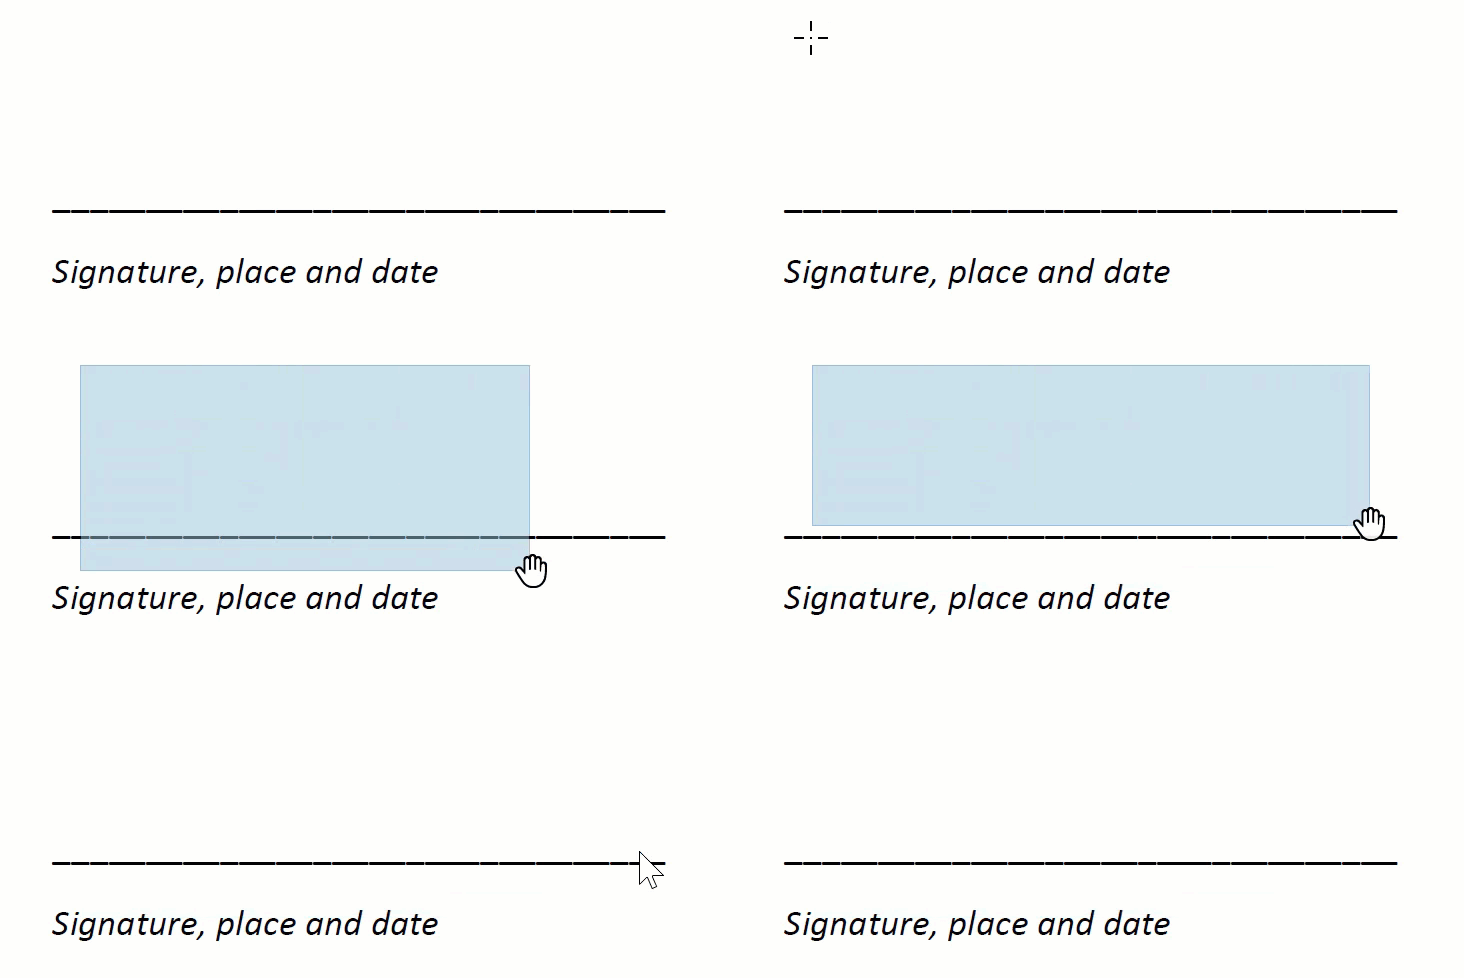
In case the data entered is correct, the tool saves the entered data for all future signatures. You will then be asked to draw a rectangle using your mouse on the currently opened document.
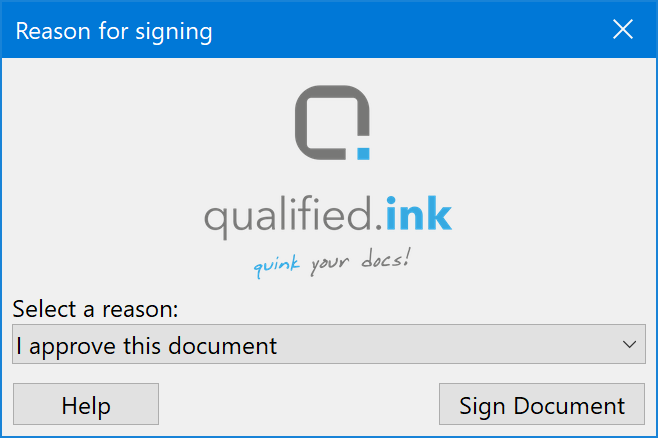
Once you have defined the area of signature, you will be asked for the reason of your signature. Please select the reason and the signature process will be launched. Then please follow the instructions on the progress screen.
Pending on your chosen authentication method (MobileID on SIM or MobileID by app), you will be prompted on your registered mobile phone to enter your PIN or biometrical identification (finger-print or face recognition):
Authentication on your mobile phone with MobileID on SIM and MobileID with the app installed.
After successful authentication, you will see the prompt “Your document has been signed successfully”. You may check “don’t show this message again” to prevent this message to re-appear. The document has been successfully signed.
2. Signing
After the initial signing has been successfully completed (please refer to 1), you click on the qualified.ink icon in the right toolbar. The qualified.ink bar on top of the document will open. Click on qualified.ink. You will then be asked to draw a rectangle using your mouse on the currently opened document.
Once you have defined the area of signature, you will be asked for the reason of your signature. Please select the reason and the signature process will be launched. Then please follow the instructions on the progress screen.
Pending on your chosen authentication method (MobileID on SIM or MobileID by app), you will be prompted on your registered mobile phone to enter your PIN or biometrical identification (finger-print or face recognition):
Authentication on your mobile phone with MobileID on SIM and MobileID with the app installed.
After successful authentication, you will see the prompt “Your document has been signed successfully”. You may check “don’t show this message again” to prevent this message to re-appear. The document has been successfully signed.
3. Validation of signatures
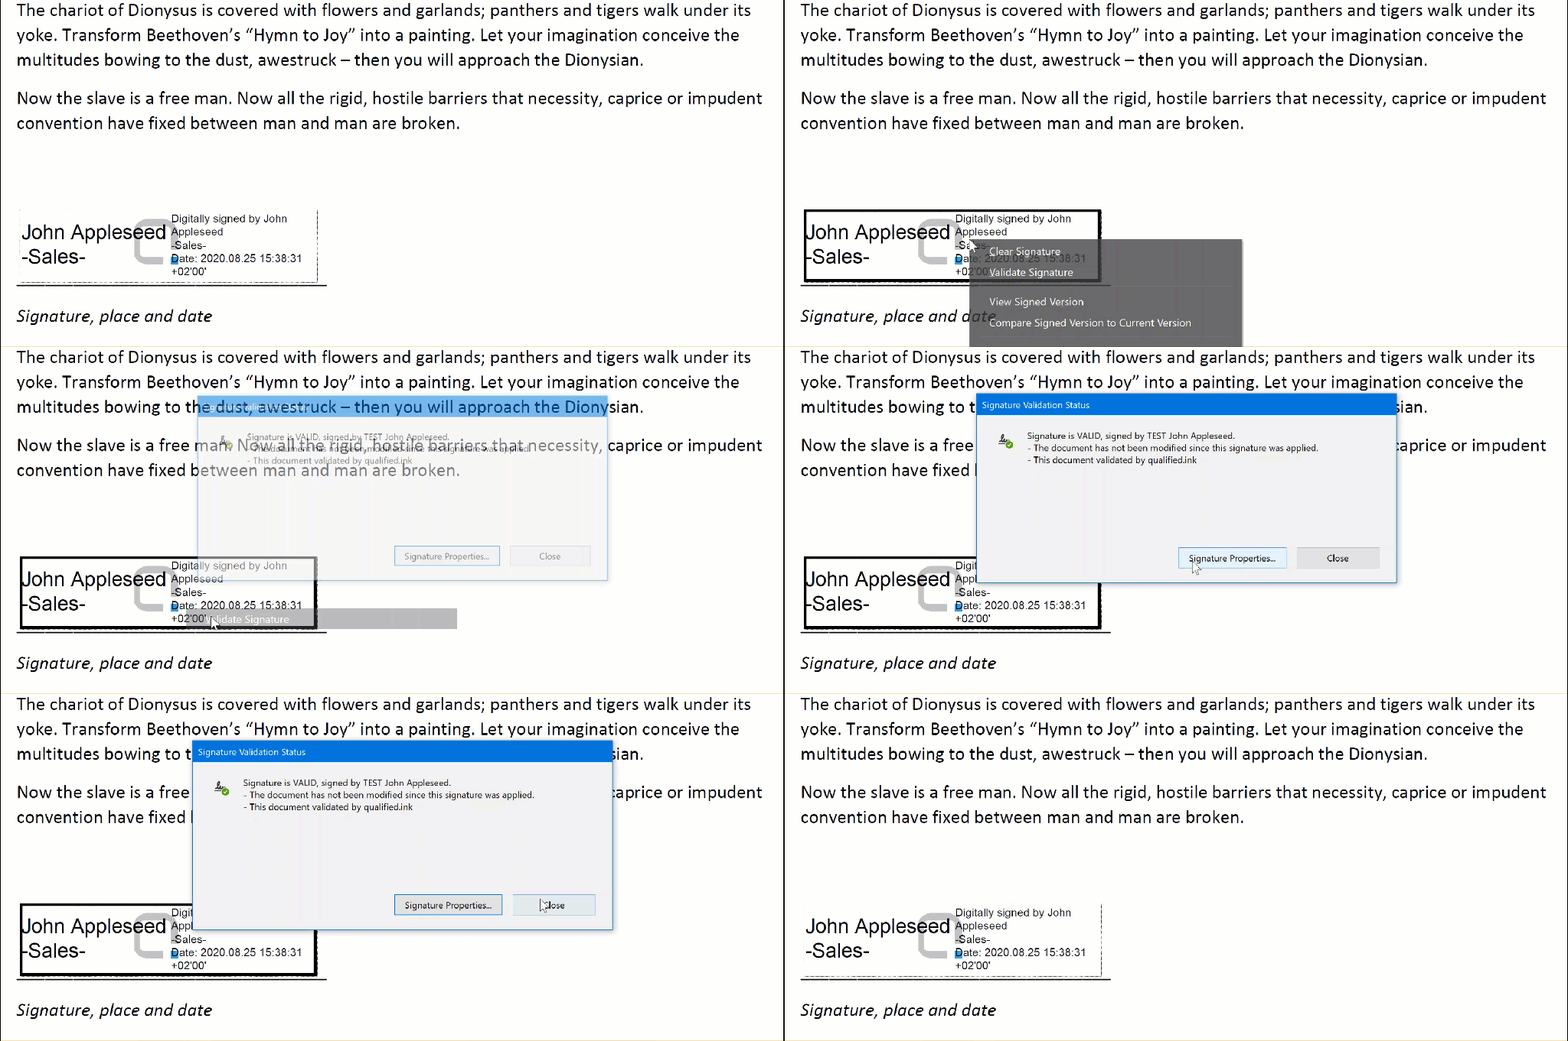
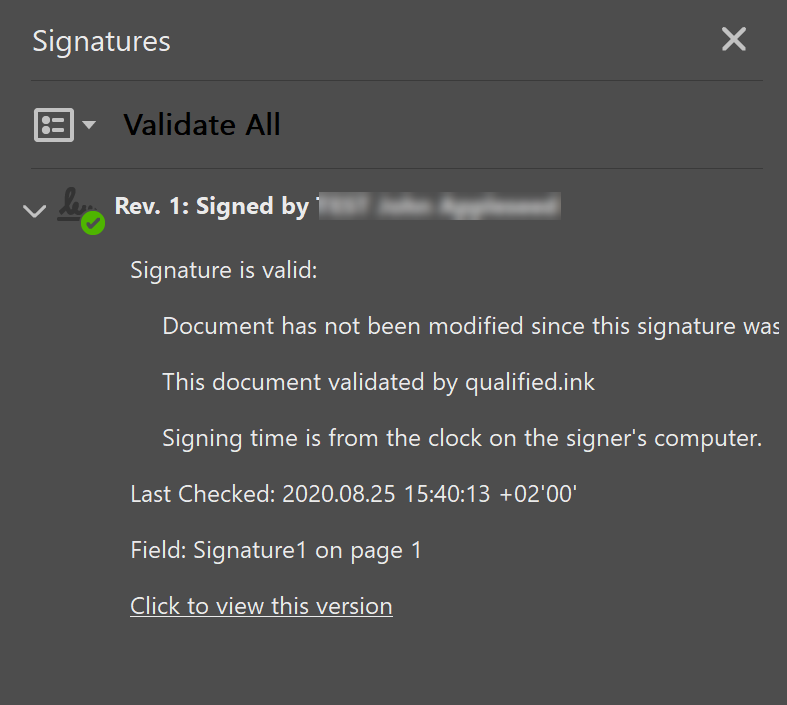
Once a document has been signed, you will see immediately
- a completed signature field with the signees name and the qualified.ink icon. Right-click on the signature field and select Validate signature… and then Signature Properties… to get a validation of the signature.
- a grey bar on top of the document saying that the document has been signed and all signatures are valid. Please click on the button Signature panel to get further information on the left side of the screen.
4. Special cases
4.1 Errors
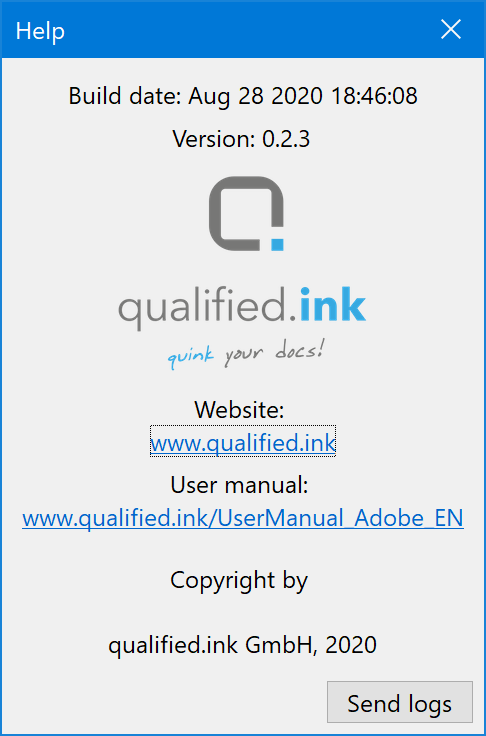
In the unlikely event of errors during signing, please call the help screen, press on the button Send log files. Your registered email application will open with a new email to support(at)qualified.ink and a log file will automatically be attached. Please send the email. We will review the data at our earliest convenience and revert to you.
4.2 Changing registration data
In case, you need to modify the configuration data (as recorded in section 1), you click on the Settings button in the qualified.ink bar. This will call the configuration dialogue where you can modify your data. Please remember to save your data.
4.3 Existing signature field
In case you need to sign a document with already existing signature field(s), please click on the qualified.ink icon in the toolbar. Then click on the signature field and follow the instructions on the screen and your mobile device.


